As an Australian Occupational Therapist, an important part of your role is to assess for and prescribe rails, this guide will help you get it right.
A comprehensive OT assessment identifies daily living challenges and recommends home modifications like rails.
This guide will provide key information about rails, including essential considerations for prescribing them.
Additionally, it covers the documentation and diagrams commonly used in the process.
We say almost because:
- A comprehensive Occupational Therapy functional assessment is critical to ensuring correct rail prescription;
- There is always more to learn;
- Building standards vary in each country and are subject to updates.
We recommend you read this guide alongside our Occupational Therapist’s Guide to Ramps and Occupational Therapist’s Guide to Stairs.

Introduction
As building standards can vary in each country, this guide should be used in unison with the building standards of your country.
In this article, we refer to the Australian Standards – AS1428.1 (2021) Design for Access and Mobility as a guide.
In general, it is recommended that rails should:
- Be scripted to meet the individual’s functional needs;
- Be installed by a trained professional, such as a builder or tradesperson;
- Be fixed firmly secured;
- Be able to withstand force of 1100 newtons applied in any position or direction;
- Be circular in shape with a diameter between 30 – 52mm;
- Be unobstructed to the passage of the hand along the length of the grab rail;
- Be set out 50mm – 60mm from the wall to avoid injuries to the hand when gripping the rail and to achieve an optimal grasp;
- Be chosen based on properties that suit the area in which it will be used, (i.e. non-slip properties if used in wet areas such as bathrooms or outdoors).
When assessing and prescribing rails there are three important things to consider:
- Functional need
- Rail properties (finish, location, size and fixing)
- Documentation and Diagrams
Let’s dive in and take a closer look!
1. Functional Need
As Occupational Therapists, we best determine the prescription of grab rails and handrails based on the client’s biomechanics, anthropometrics and functional use.

The correct prescription of rails is important to ensure that the rail provides support where necessary to perform specific tasks, facilitate transfers and/or support mobility.
In Australia, we are able to refer to the Australian Standards AS1428.1 (2021) Design for Access and Mobility to guide our recommendations.
We use the standard as a guide or starting point with recommendations based on the unique needs of the client as determined by a comprehensive functional assessment.
So, what are biomechanics and anthropometrics?
- Biomechanics is the study of anatomical principles of movement that takes into account the unique movement patterns of an individual as a result of their age, health and body measurements.
- Anthropometrics are the body measurements of an individual including their height, weight, width and depth, which can impact reach range and also the force they may place upon a grab rail.

Putting it into practice…
When assessing a client to determine if they may require a grab rail or handrail, we look at how they interact with their environment.
Generally, indicators will be most notable when you complete a walk through of the home with your client and request they demonstrate how they are currently completing tasks.
You may want to consider:
- Where do they place their hand?
- Do they push or pull to stand?
- How do they move during the task?
- Are they seated or standing during task completion?
- Which is their dominant hand?
These considerations can help determine the type of rail and the optimal positioning for it.
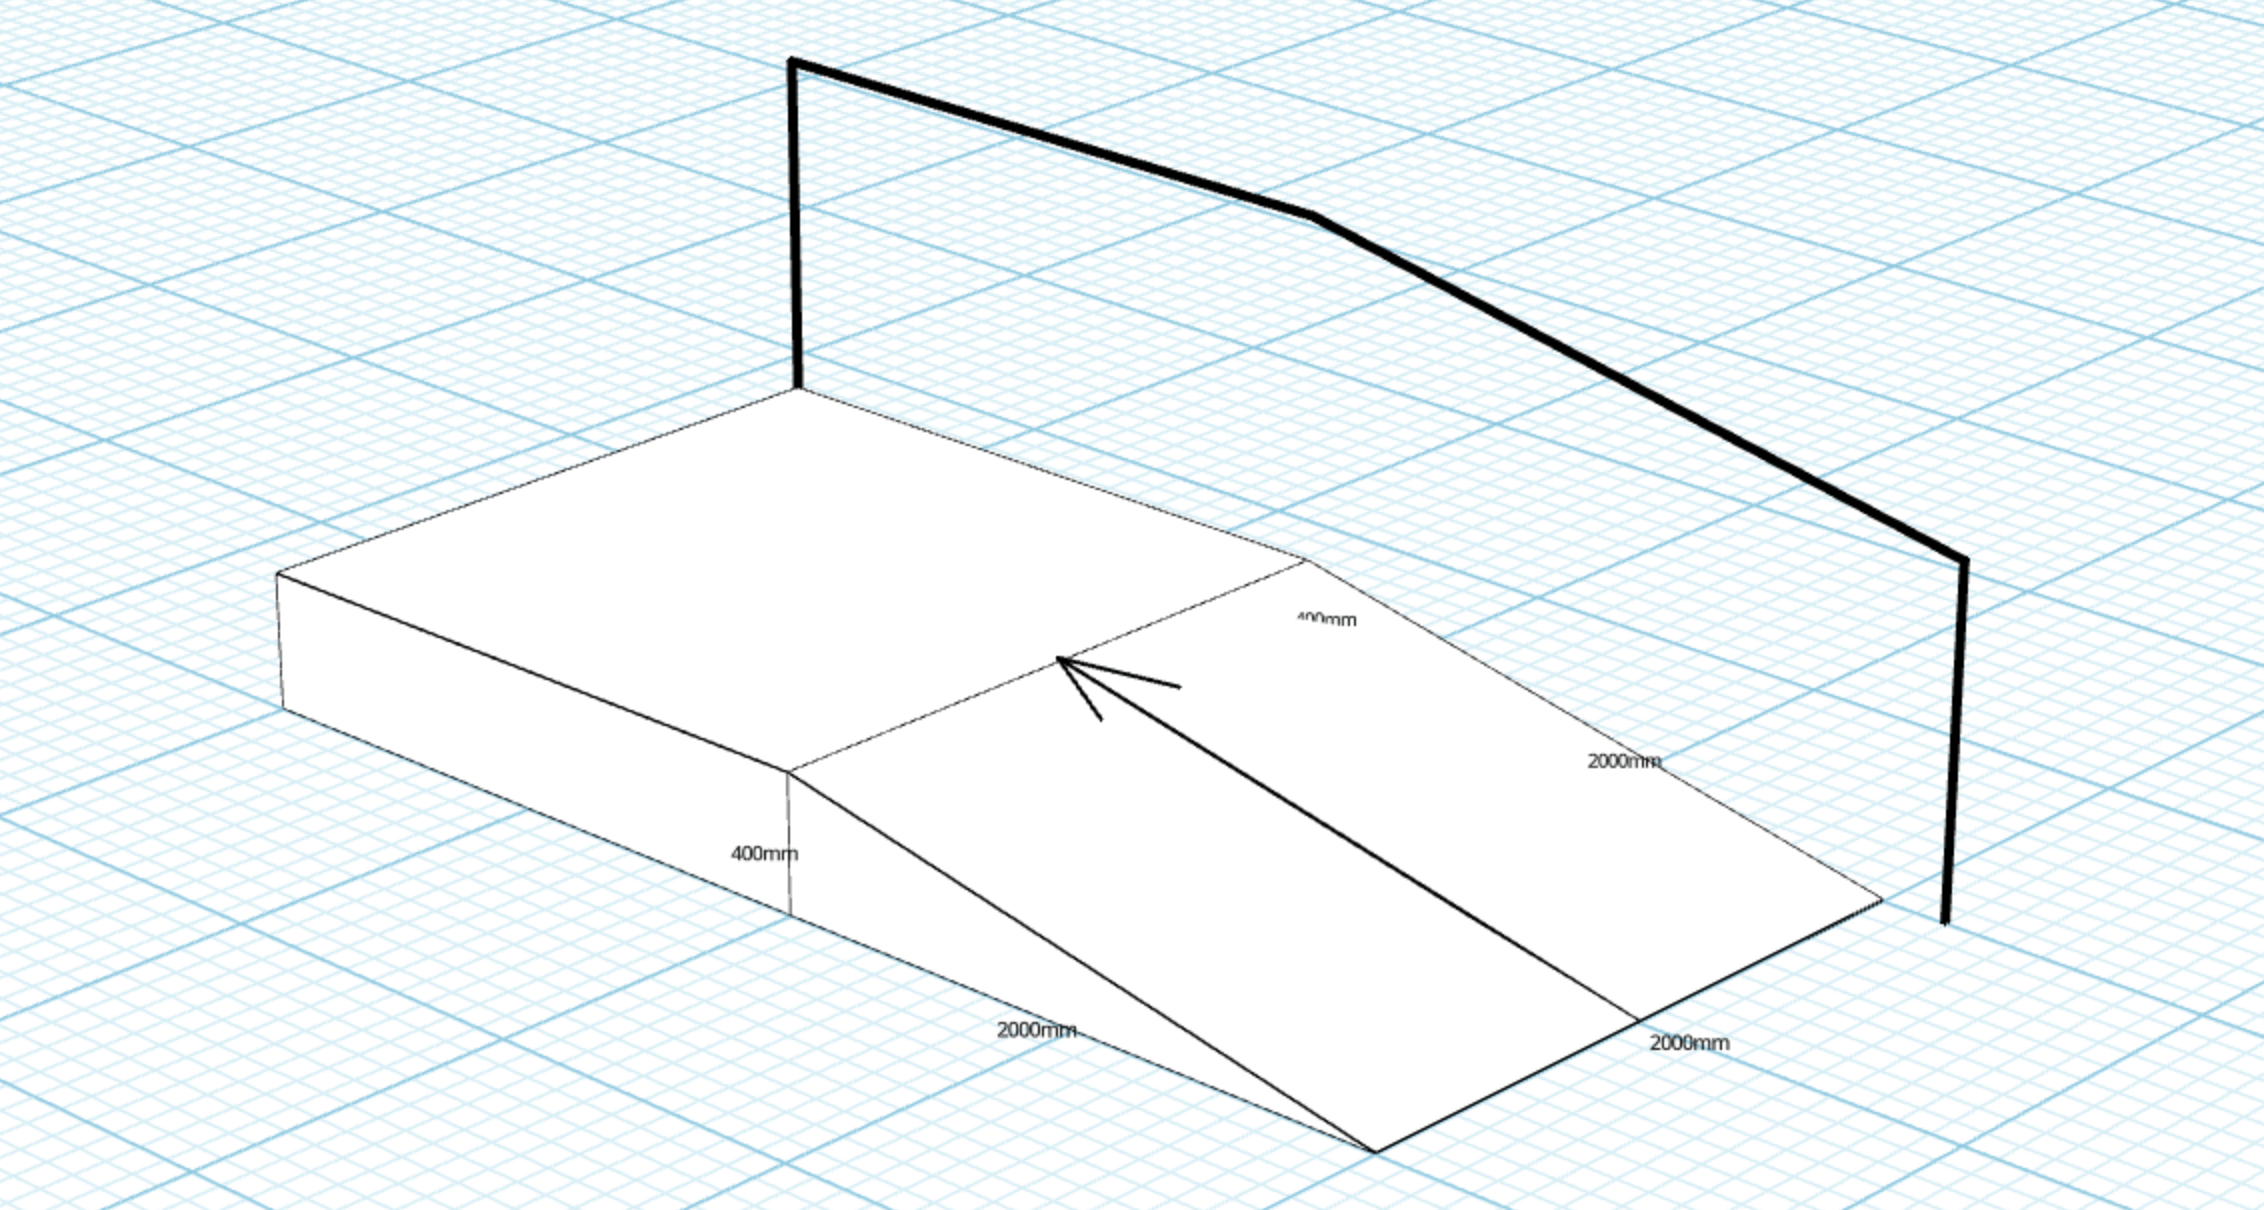
They may also lead you to deviate from the relevant standards of the country in which you are operating.
2. Rail Properties
When referring to rail properties, we are referring to the type, finish, location, size and fixing.
Understanding the properties of the rail enable Occupational Therapists to effectively recommend rails that are suitable for the functional and clinical needs of the client.
We describe rails by;
- The diameter, i.e. 32mm
- The direction in which they are installed, i.e. horizontal or vertical rail.
- The shape in which the rail is constructed, i.e. right-angled rail.
- The points in which it connects, i.e. floor to ceiling.
- The side of ascension, i.e. right-hand ascending.
Further to this, we classify rails as either grab rails or handrails;
- Handrails are generally classified as rails which are external to the home, installed at steps, ramps or footpaths for a continuous line of support.
- Grab rails are generally internal to the home and installed as a transfer or support aid. They come in a range of lengths and can be installed vertical, horizontal or angled depending on the support needed.
When prescribing rails, it is also important to consider the Safe Working Limit (SWL).
If an individual is close to the safe working load (SWL) or has fluctuating weight that brings them within this range, it’s important to inform the builder installing the rail.
This allows them to add reinforcement as needed to meet the building codes relevant to the region.
The most common grab rails prescribed by Occupational Therapists and their benefits are:
Horizontal grab rails
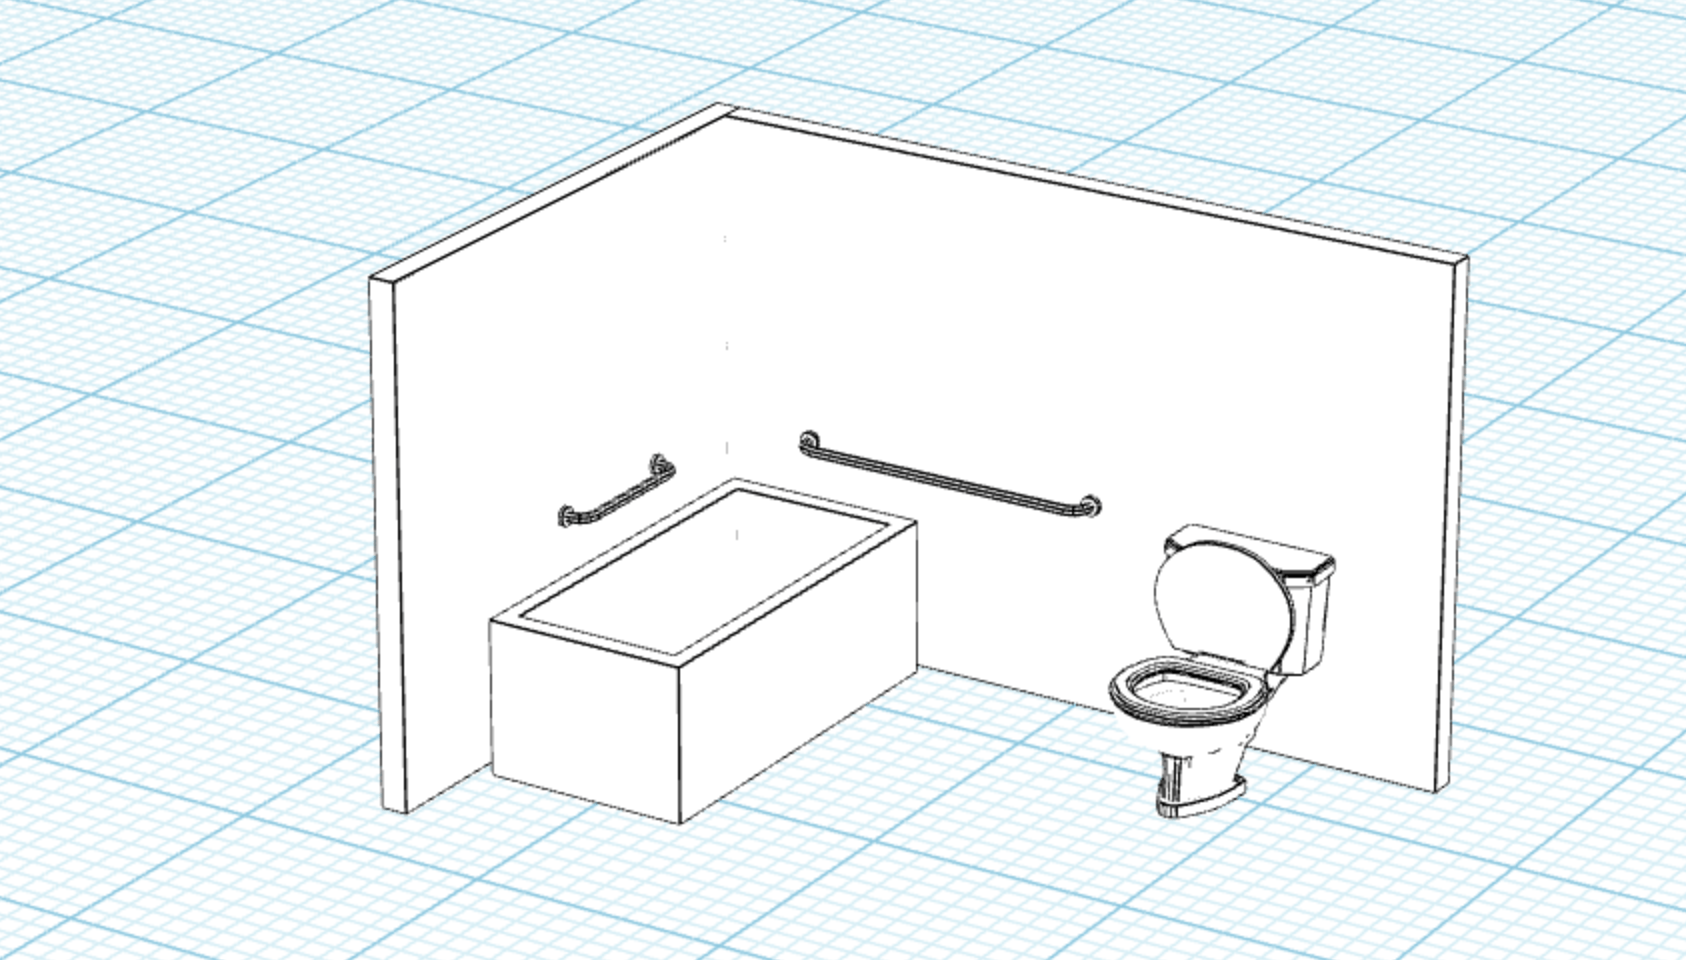
Horizontal rails assist individuals when pushing up from a seated position and provide support when lowering, for example, onto a toilet.
Some individuals find it easier to push down on a rail rather than pull up on one, and for those that prefer this action, horizontal rails are more commonly prescribed.
Vertical grab rails
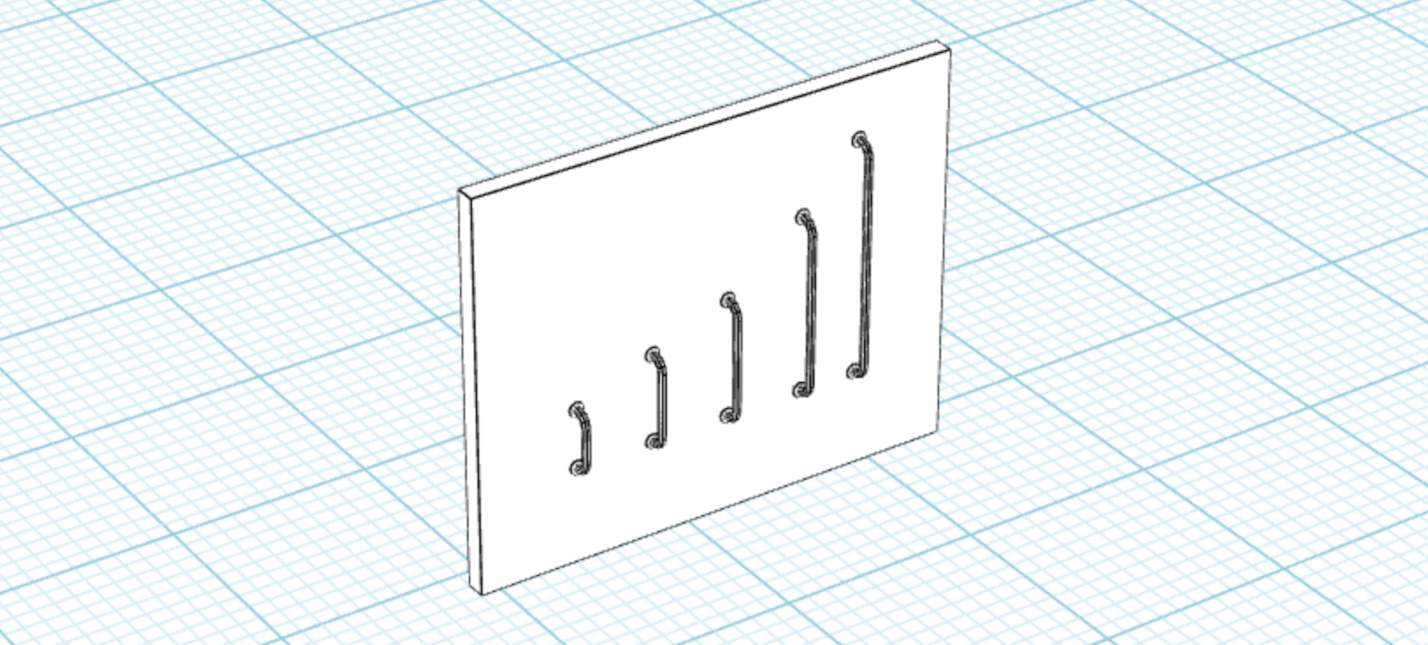
Vertical rails assist when pulling up into a standing position or when standing for stability.
Individuals that experience difficulty pushing through their arms or wrists, may prefer a vertical rail. Vertical rails are often installed at threshold steps, doorways or entries.
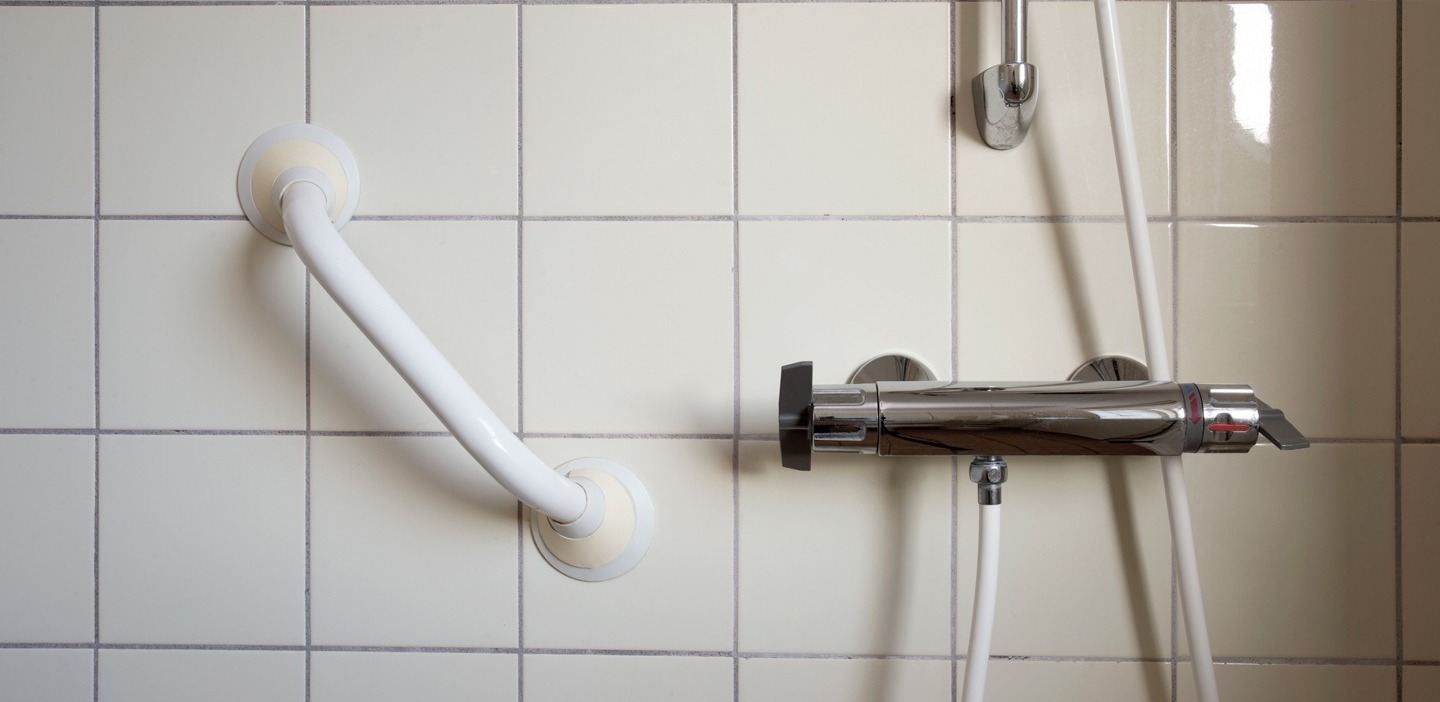
Diagonal or angled grab rails

Rails that are fixed at an angle enable someone with weak or painful arms or wrists to support their forearm whilst pushing up.
Typically, a diagonal rail is placed at an angle of 45° upwards and away from the user.
This keeps the wrist in a neutral position, and the hand can travel up the rail to maintain the support once the person throughout the transfer.
Right-angled grab rails
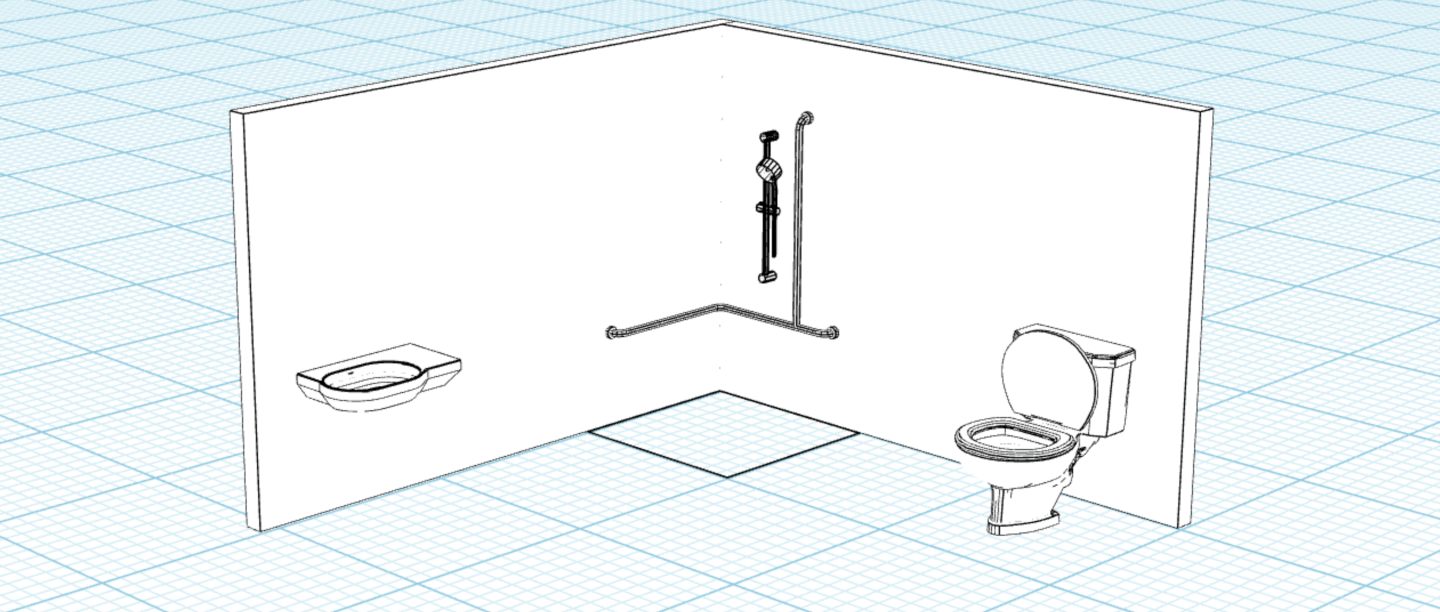
Also known as L-shaped rails. Rather than installing a separate horizontal and vertical grab rail, a continuous right angled rail can be prescribed.
A right-angled rail is considered safer than the installation of two rails side by side as there is no gap between the rails that could result in entrapment or injury, and it offers a continuous line of support when moving through a movement or transfer.
This type of rail is often prescribed next to a toilet.
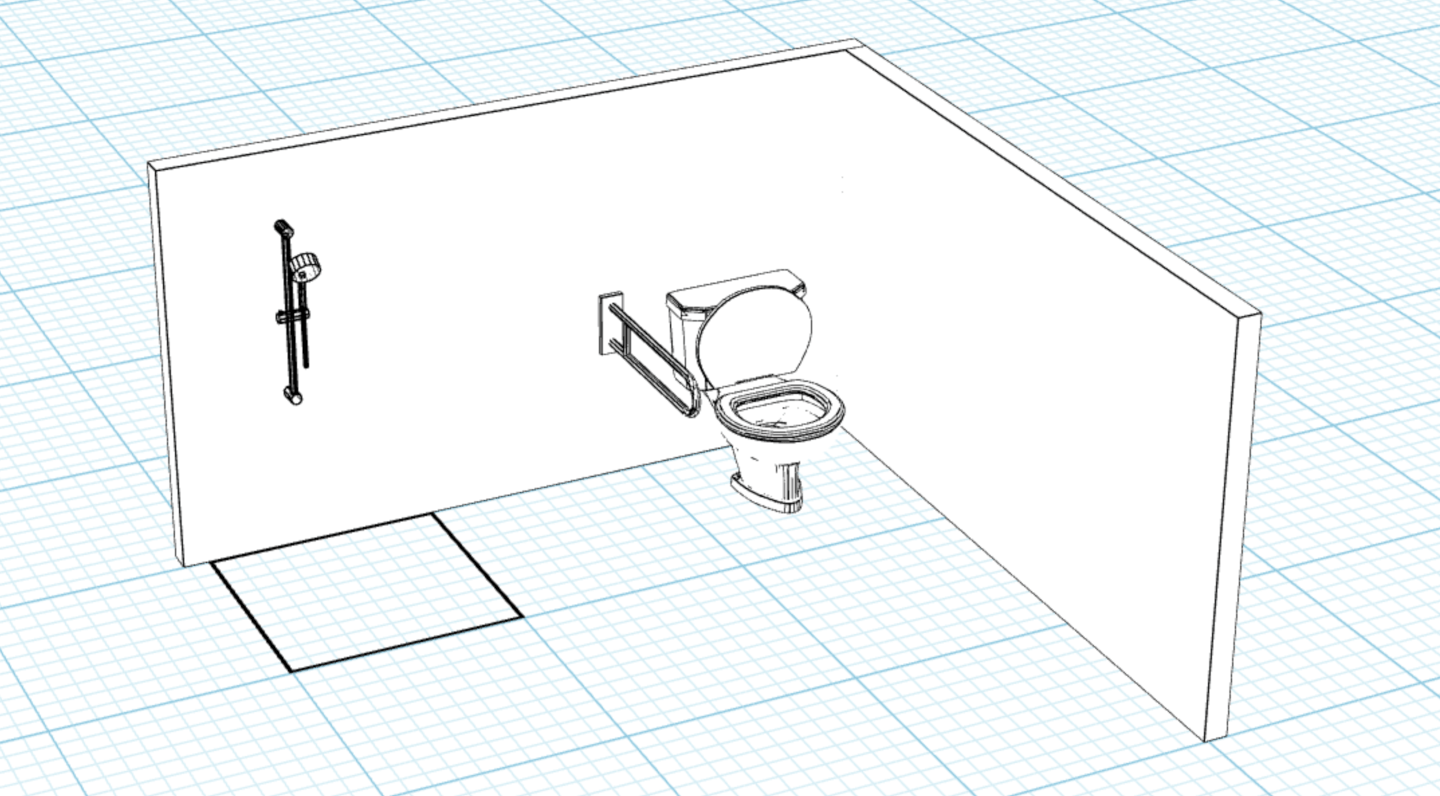
Drop hinged grab rails
Also known as drop-down, swing away or fold-down rails.
A drop-hinged rail is a common type of grab rail that assists someone with transferring on and off a toilet.
It is commonly prescribed when a rail is needed at a point away from a side wall, i.e. the opposing side of the toilet. These rails often require the wall to be reinforced to be able to withstand the downward pressure applied to the grab rail during transfers.
Consultation with a builder is recommended for successful prescription and to ensure the proposed works are viable for the home environment.
Floor to ceiling grab rails
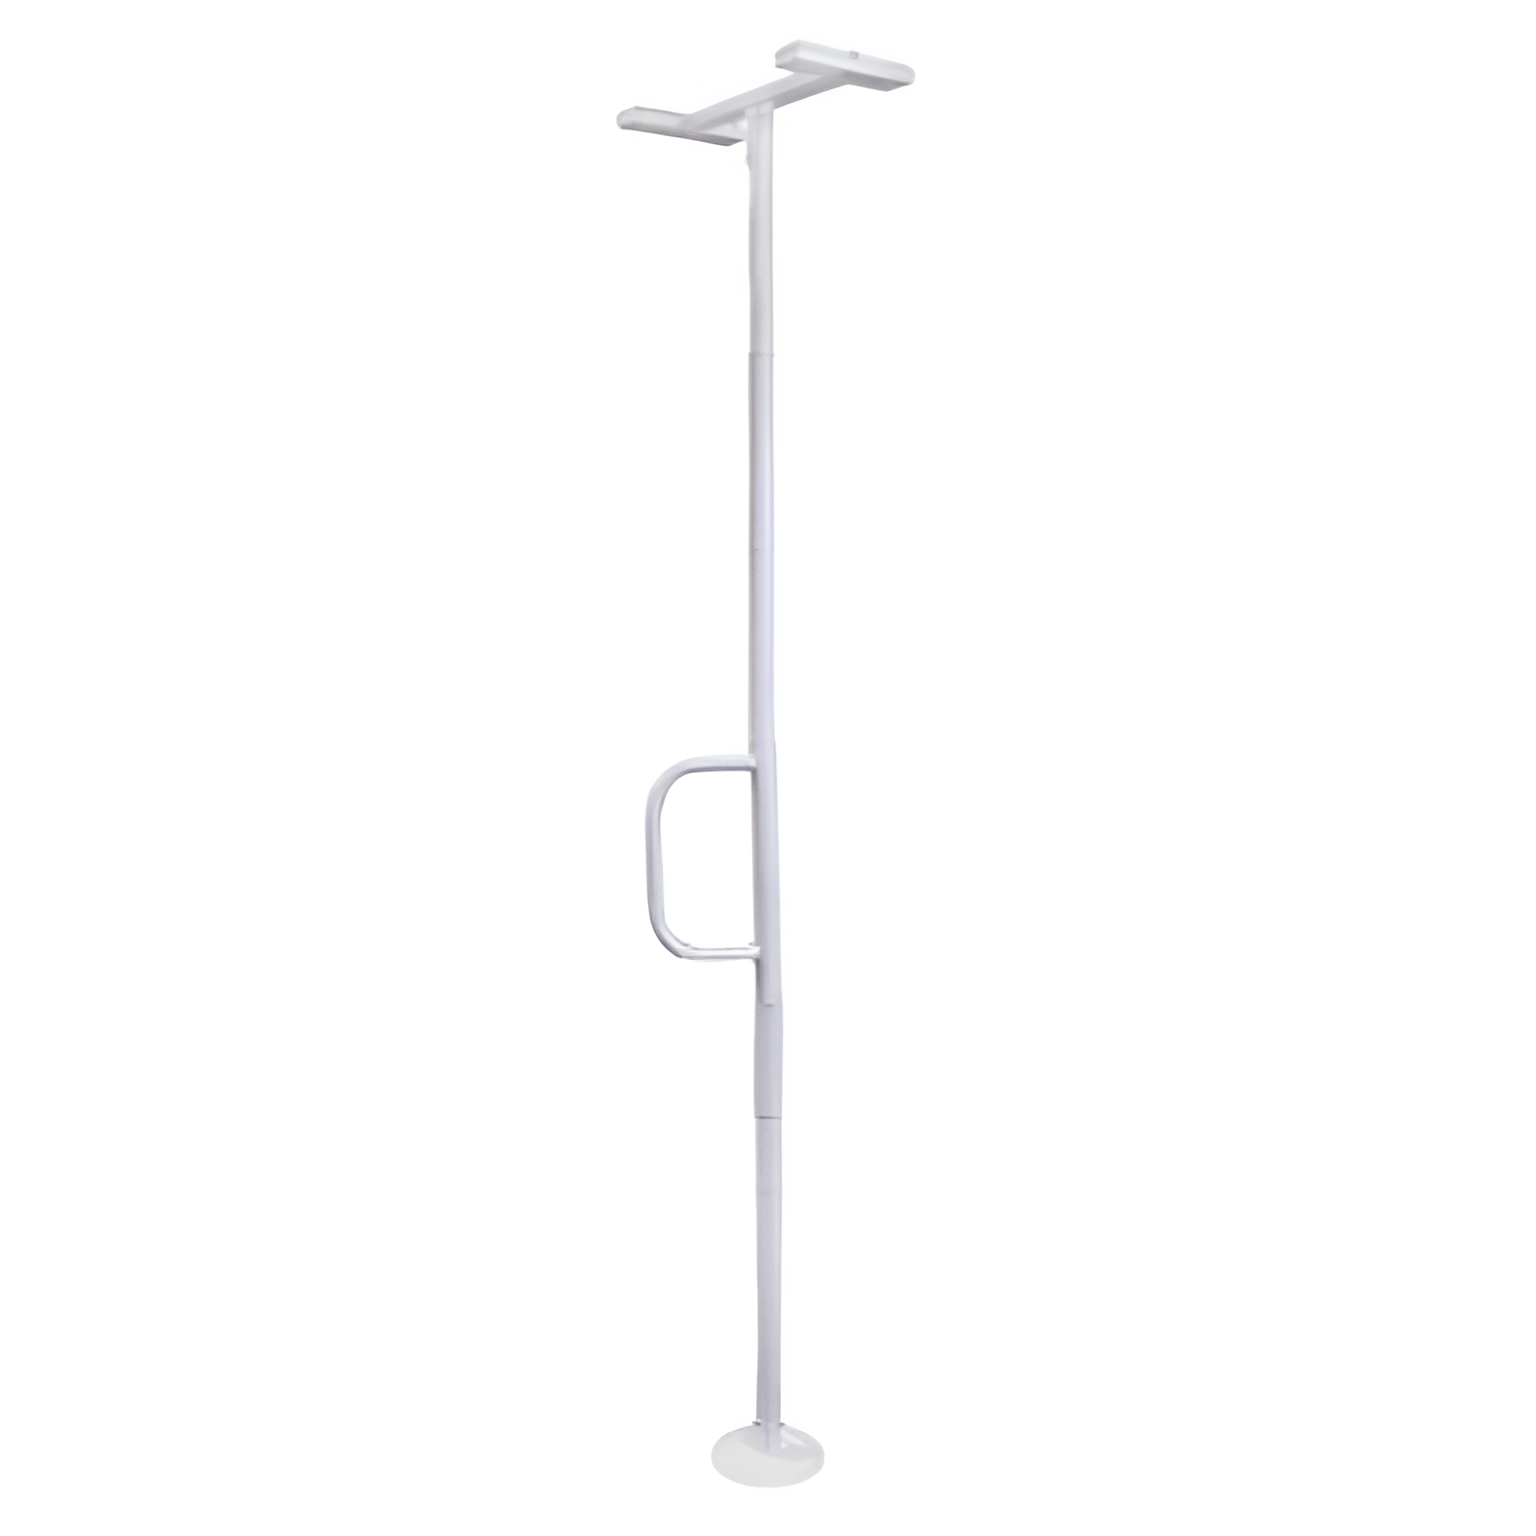
Also known as a fireman’s pole. As the name suggestions, this rail extends from the floor to the ceiling vertically.
A floor to ceiling rail may be suitable in bathroom modifications to support an individual where other rail types are not able to be prescribed, such as if support is required in areas outside of reach of a wall.
For example, beside a bath. These rails require investigation for the support structure of both the ceiling and floor, which results in them being less commonly prescribed.
Clamp on grab rails
A clamp on grab rail is secured via a clamp system to the edge of a bathtub and do not require installation by a licensed tradesperson.
Clamp on rails are not preferred due to the risk of loosening and not being maintained adequately by the user and are typically recommended only when a fixed grab rail is not appropriate or suitable.
Suction grab rails
Suction grab rails are not typically recommended due to the risk of loosening and coming unstuck, which presents a serious falls risk.
Suction grab rails also cannot achieve the required 1100 newtons of downward force, as they are not installed at studs or supports.
Suction grab rails can also rip off tiles on walls, when the suction itself is stronger than the bonding agent of the tiles to the wall.
If required to be used, suction rails should be used as a short-term solution only and regularly checked to ensure they have not become loose.
Finish
Rails are available in a number of material finishes and should be prescribed based on the individual unique care needs of the client.
The finish of rails is particularly important in wet spaces and is often influenced by aesthetic reasons.
Some of the most common rail finishes include:
Polished stainless steel

This finish is considered more attractive and is hard wearing, although can be quite slippery to hold, especially when hands are wet.
This finish is a common option for grab rails at thresholds and for handrails at internal staircases.
Galvanised steel

This finish is prepared by adding a layer of zinc coating to the surface to reduce the likelihood of corrosion.
It is commonly recommended for external stairs and in conditions where corrosion is more likely to occur, for example, in coastal regions.
Slip-resistant / peened / knurled / ribbed finish

This is a moulded/coated textured surface that provides increased grip even when wet.
This finish can cause discomfort during gripping, particularly for those with increased sensitivity and are typically not suitable to slide the hand across.
Powder-coated
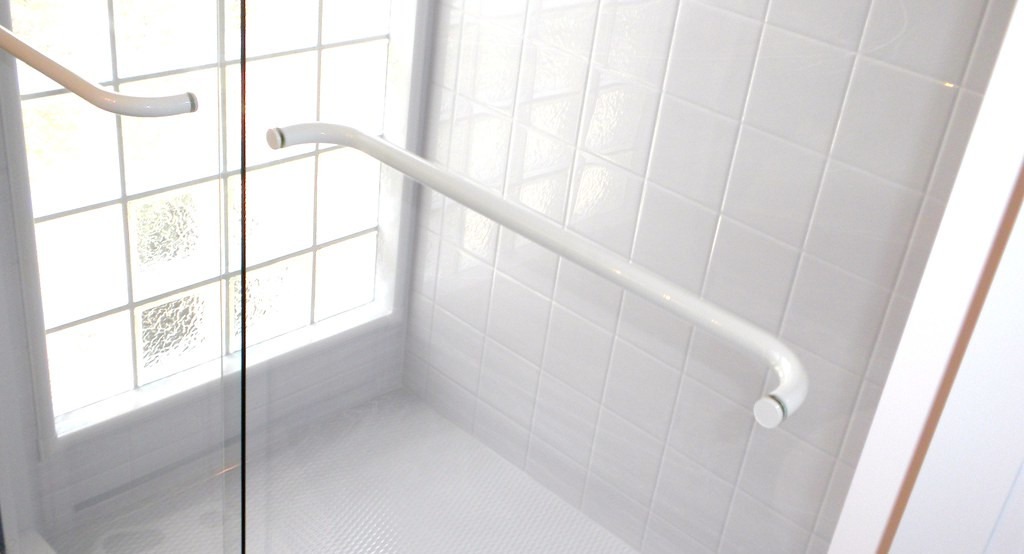
Powder coated rails are the most commonly prescribed for wet spaces, including bathrooms as they are hard-wearing and more resistant to the effects of condensation.
This finish is also customisable with a choice of colours available to meet aesthetic requirements.
High contrast finish
A high contrast finish can be achieved by choosing a colour that contrasts with the wall behind it.
For example, a person with a vision impairment may benefit from a black powder coat finish to contract to a white tiled wall.
Size
The size of rails are predominantly determined by two key factors, the location of fixtures, i.e. studs, and the functional need, i.e. higher or longer for taller clients.
In Australia, there are standard length rails at 300mm, 450mm, 600mm, 900mm and 1200mm that are available to be purchased off the shelf from local hardware stores, or custom-made lengths can be manufactured by licensed professionals.
Fixing
It is very important that grab rails have strong and stable attachments in order to effectively support the weight of the user.
Unfortunately, many houses do not always have internal walls that are ideal for the installation of grab rails, and installation of rails cannot always be achieved as initially recommended.
It is the responsibility of the builder or tradesperson to install the grab rail correctly, however, the Occupational Therapist should have a sound understanding of the different fixings and their requirements to assist with prescription.
Some fixing options and the associated considerations include;
Traditional brick, masonry or concrete

There should be minimal restrictions with fixing grab rails to traditional solid walls.
Any plasterboard or tiled surfaces on top of the solid wall, should not affect the fixing as long as the fixture is secured deep enough.
Lightweight aerated and hollow bricks
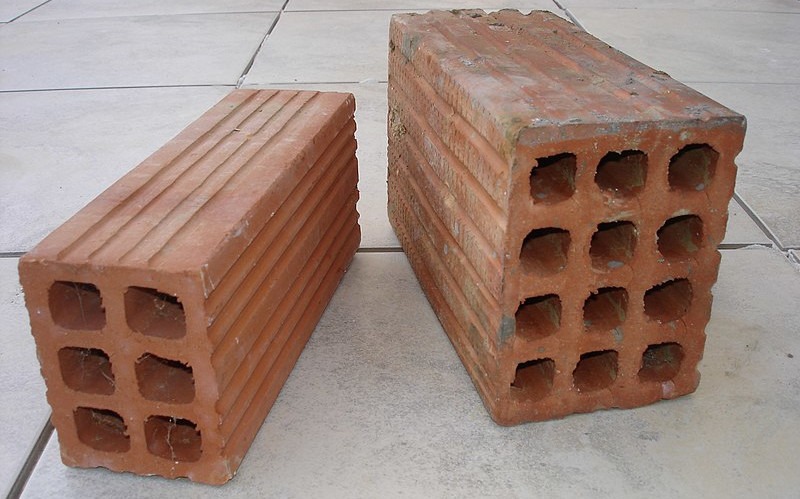
Lightweight, aerated and hollow bricks are typically unable to withstand the loads required of a grab rail.
Consult a tradesperson before recommending rails.
Stud walls

Most commonly, grab rails are installed into stud walls.
In Australia, studs are typically spaced 450mm or 600mm apart which is useful to know when considering recommending horizontal grab rails. The builder may contact you to deviate from your proposed position to align with the studs.
When completing major modifications, the walls are stripped back and structural sheeting or blocking is able to be fixed between studs increasing the options for placement of grab rails.
Steel framed

When considering the installation of rails into steel framed houses, it is important to consider the client’s weight as grab rails secured in steel framework is only weight rated to 100kg.
Fibreglass or moulded shower units

Not suitable for installation of grab rails. This material is typically found in caravan parks and mobile homes, although can be found in standard homes too.
Location
The location of the rail is determined by;
- The individual’s unique care needs as assessed in the comprehensive Occupational Therapy functional assessment.
- The fixing points available based on the construction of the home and information gained in consultation with a trained professional such as a builder.
According to the Australian Standards of Design for Access and Mobility (AS1428.1 – 2021), the following information can be used as a guide to inform the clinician on where to locate a grab rail*.
*Note: The height of the horizontal rail from the finished floor level (FFL) is always calculated to the top of the rail.
Toilet
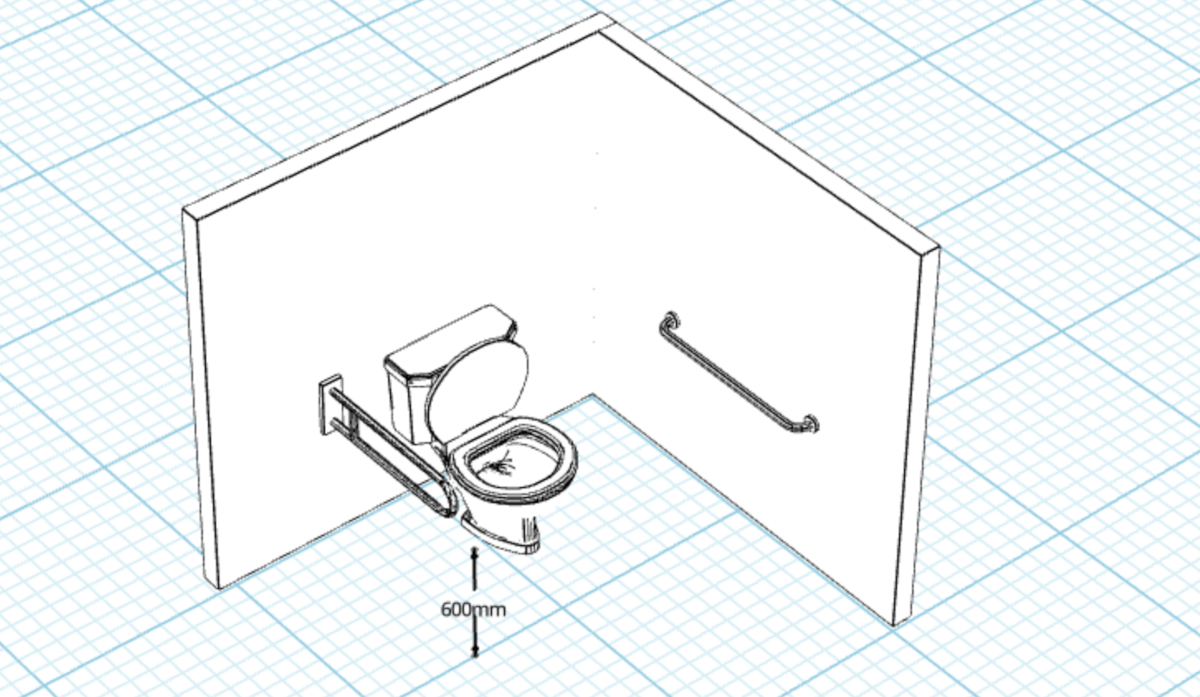
Grab rails are often fixed against the wall alongside a toilet. There can be occasions where this is not possible due to the wall being too far away from the toilet or an obstruction preventing installation.
In these situations, a drop hinged grab rail that is fixed to the wall behind the toilet may be suitable to prescribe.
When considering installation of a rail near a toilet, consider what support the client will need during the movement sequence from sit to stand.
The AS1428.1 (2021) indicate the following specifications:
A horizontal toilet grab rail is recommended to:
- Be placed at a height of 800mm – 820mm from FFL;
- Begin 50mm – 60mm from the wall in which the toilet is backing;
- Extend 100mm – 150mm past the toilet (before changing direction, if combination rail);
- Be close enough to the client to be within functional reach range. Australian Standards indicate walls to be 450-460mm from the centre of the toilet pan. Consider a drop-down rail or equipment if the nearest wall is outside this range.
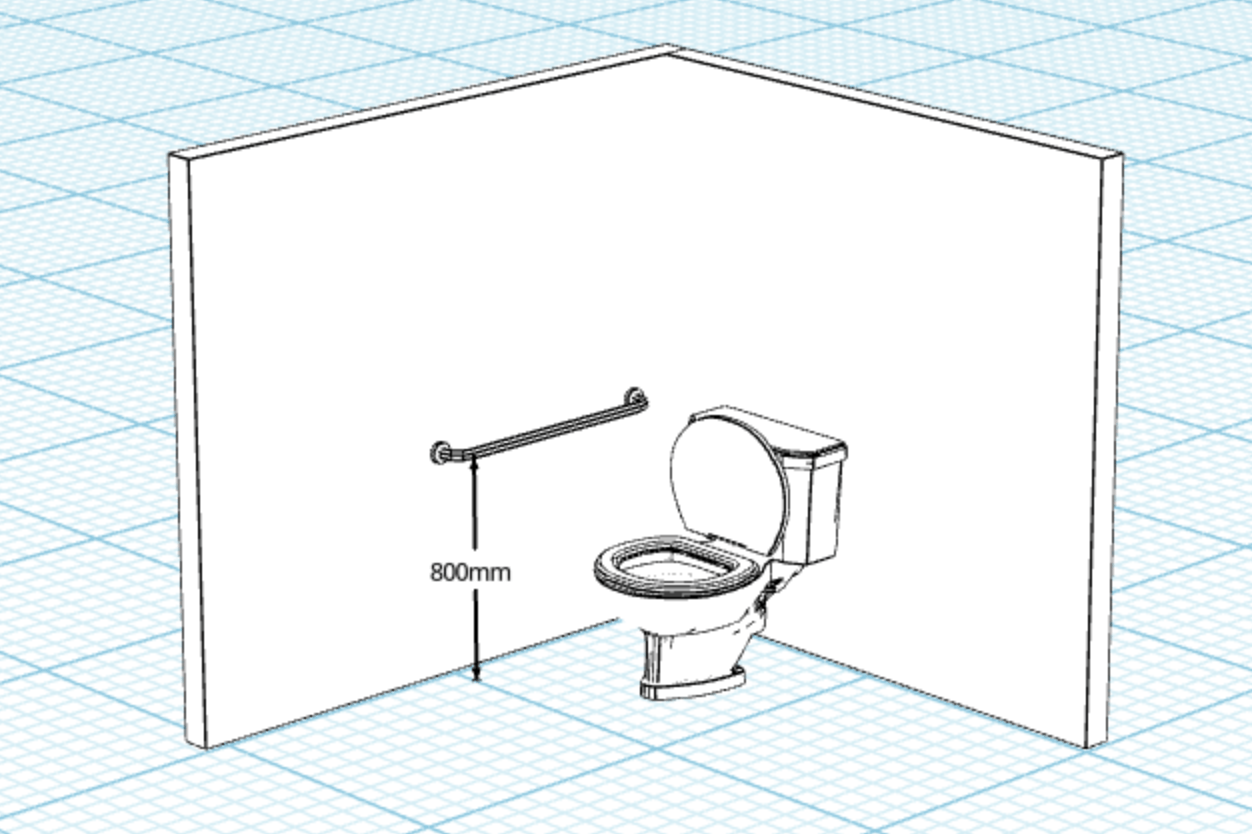
A vertical toilet grab rail is recommended to:
- Be placed at a distance of 200mm – 250mm in front of the client’s knee when seated on the toilet;
- Be placed at a height of 800mm – 820mm from FFL;
- Extend to a minimum of 1400mm from the floor.
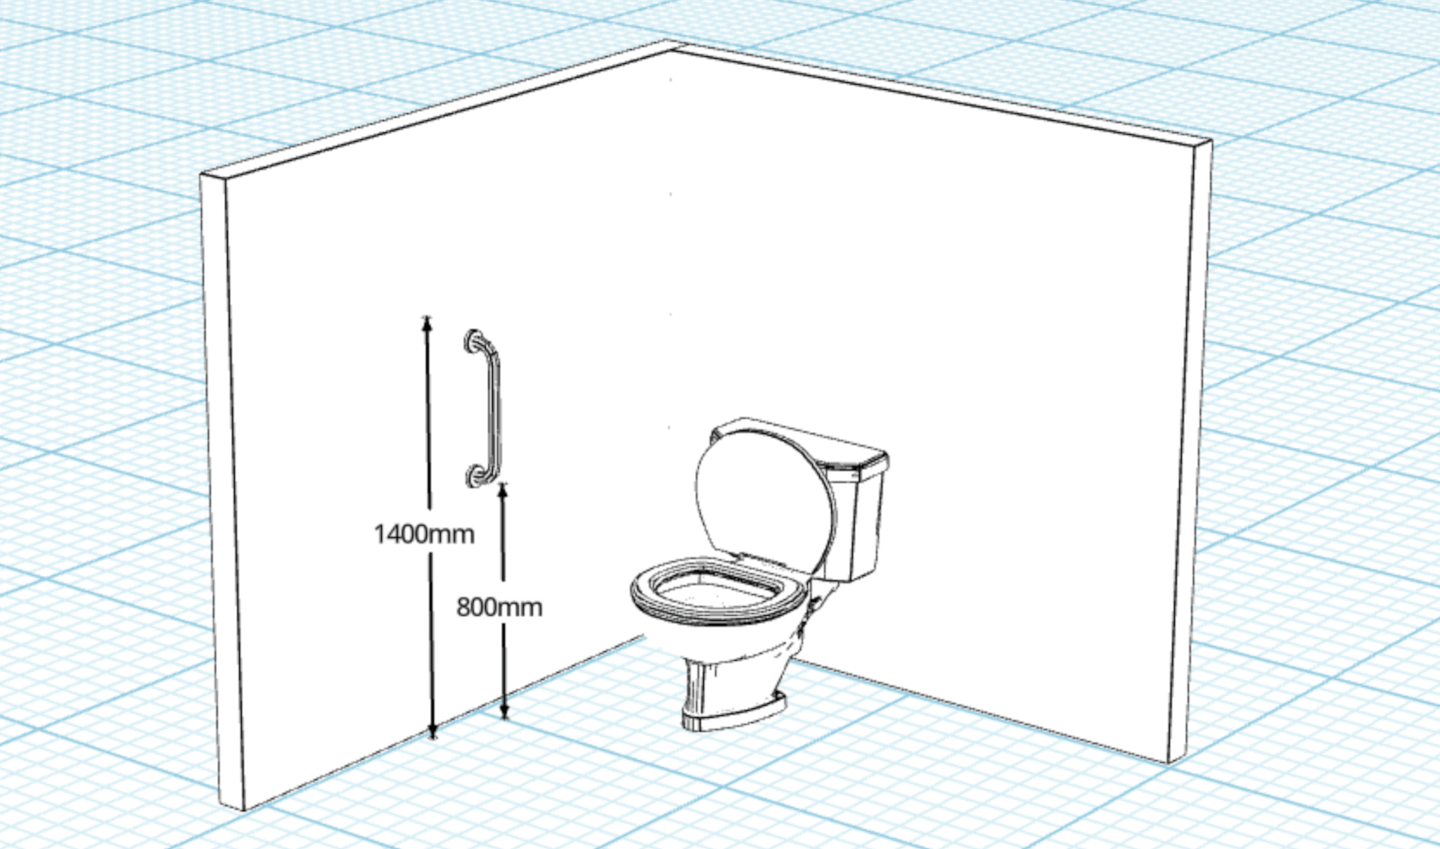
An angled toilet grab rail is recommended to:
- Be placed at a the lowest point at a height of 800mm – 820mm from FFL;
- Begin 100mm – 150mm past the toilet;
- Extend at least 700mm and at a 30 – 45 degree angle.
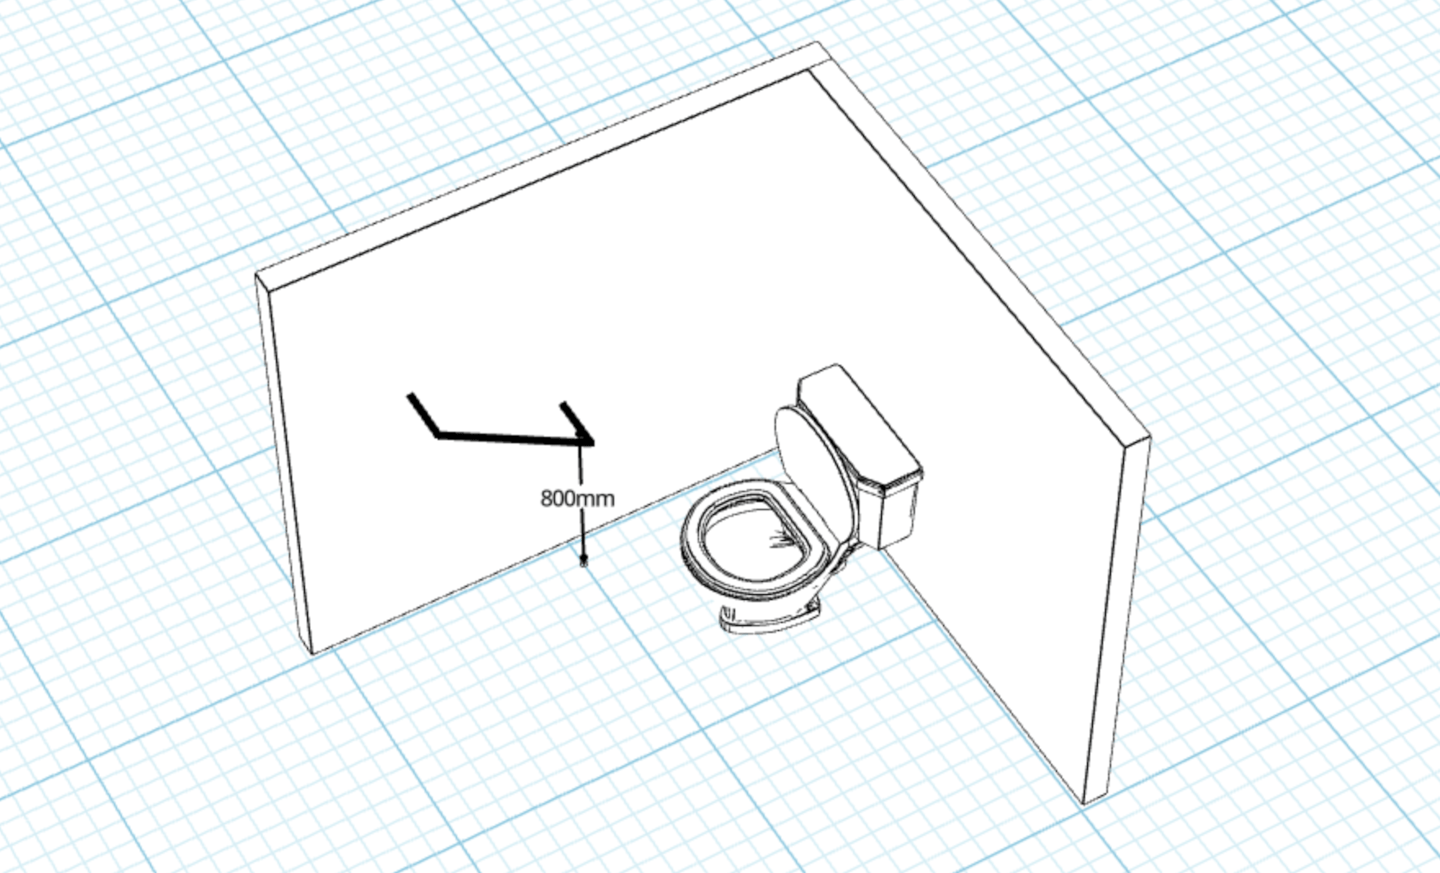
A drop down hinged toilet grab rail is recommended to:
- Be placed at a height of 800mm – 810mm from FFL;
- Extend 100mm – 150mm past the toilet;
- Be specified in scope of works if toilet roll holder or folding support leg is to be included.
Stairs
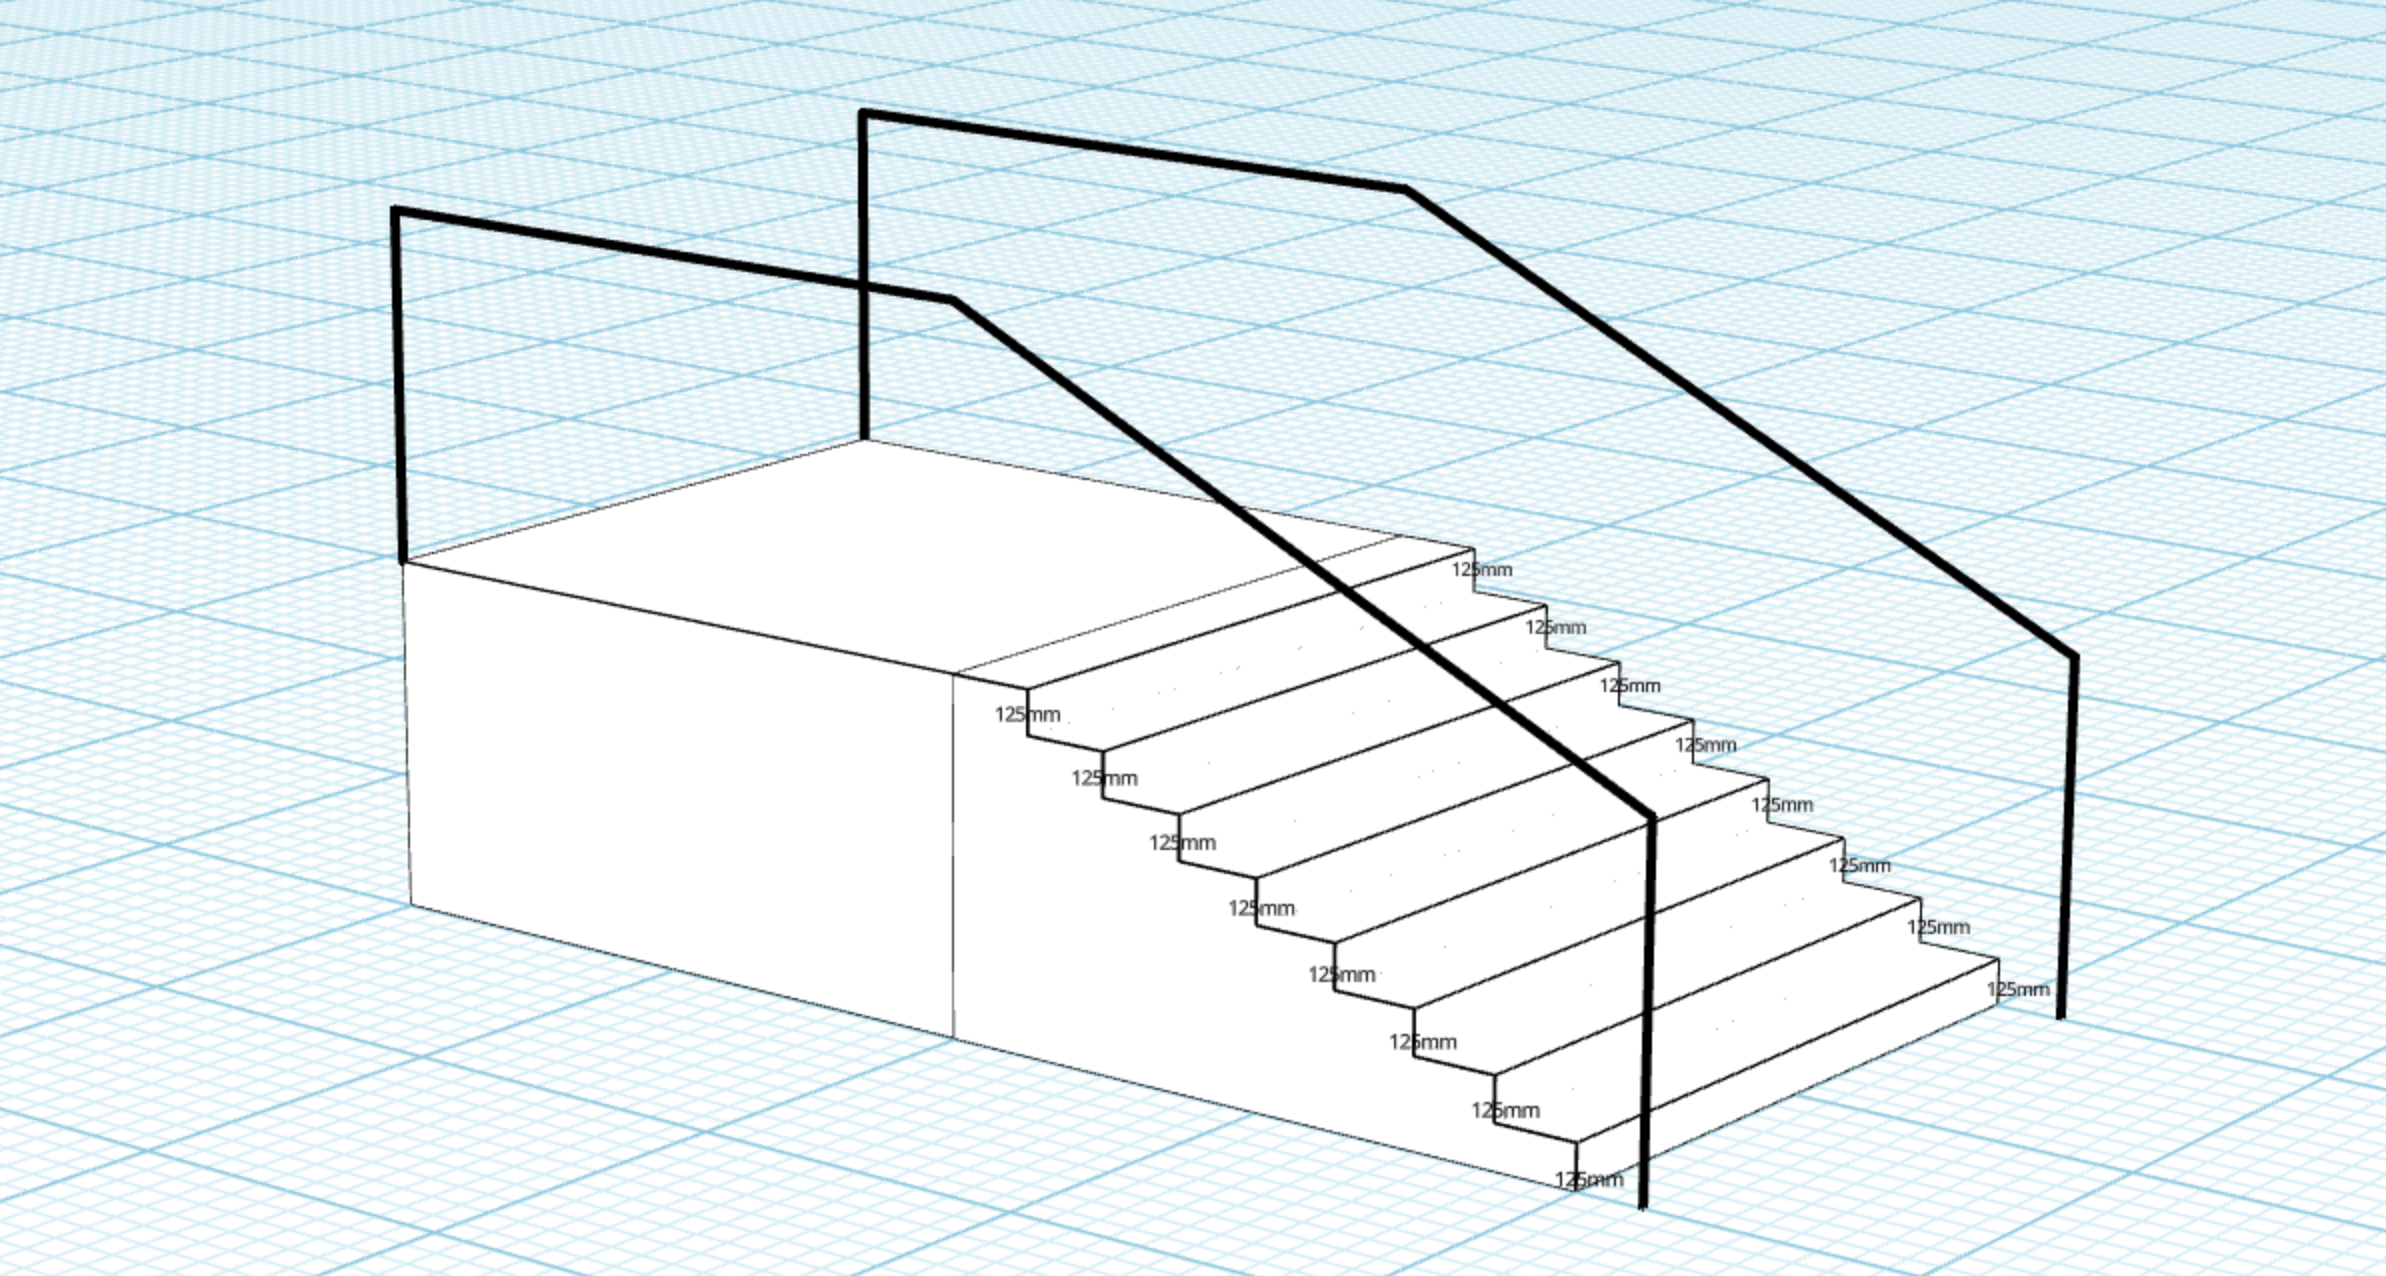
A handrail can be prescribed to assist an individual in traversing stairs. You can read more about stairs in our Occupational Therapist’s Guide to Stairs.
A handrail placed on stairs is recommended to:
- Run parallel to the gradient of the stairs;
- Have a diameter between 30mm – 50mm;
- Be located between 865mm – 1000mm above the nosing of the stairway tread. The exact location within this range will be determined by the individual’s anthropometrics and how they interact with the environment;
- Have a consistent height from floor through the stairs and any landings;
- Extend 300mm beyond the top and bottom of the steps;
- Have the ends turned through a total of 180 degrees, or to the ground, or fully returned to end post or wall face;
- Have no obstructions on or above the handrail for at least 600mm;
- Have a minimum clearance of 1000mm from the handrail on the opposing side of stairs.
Threshold step
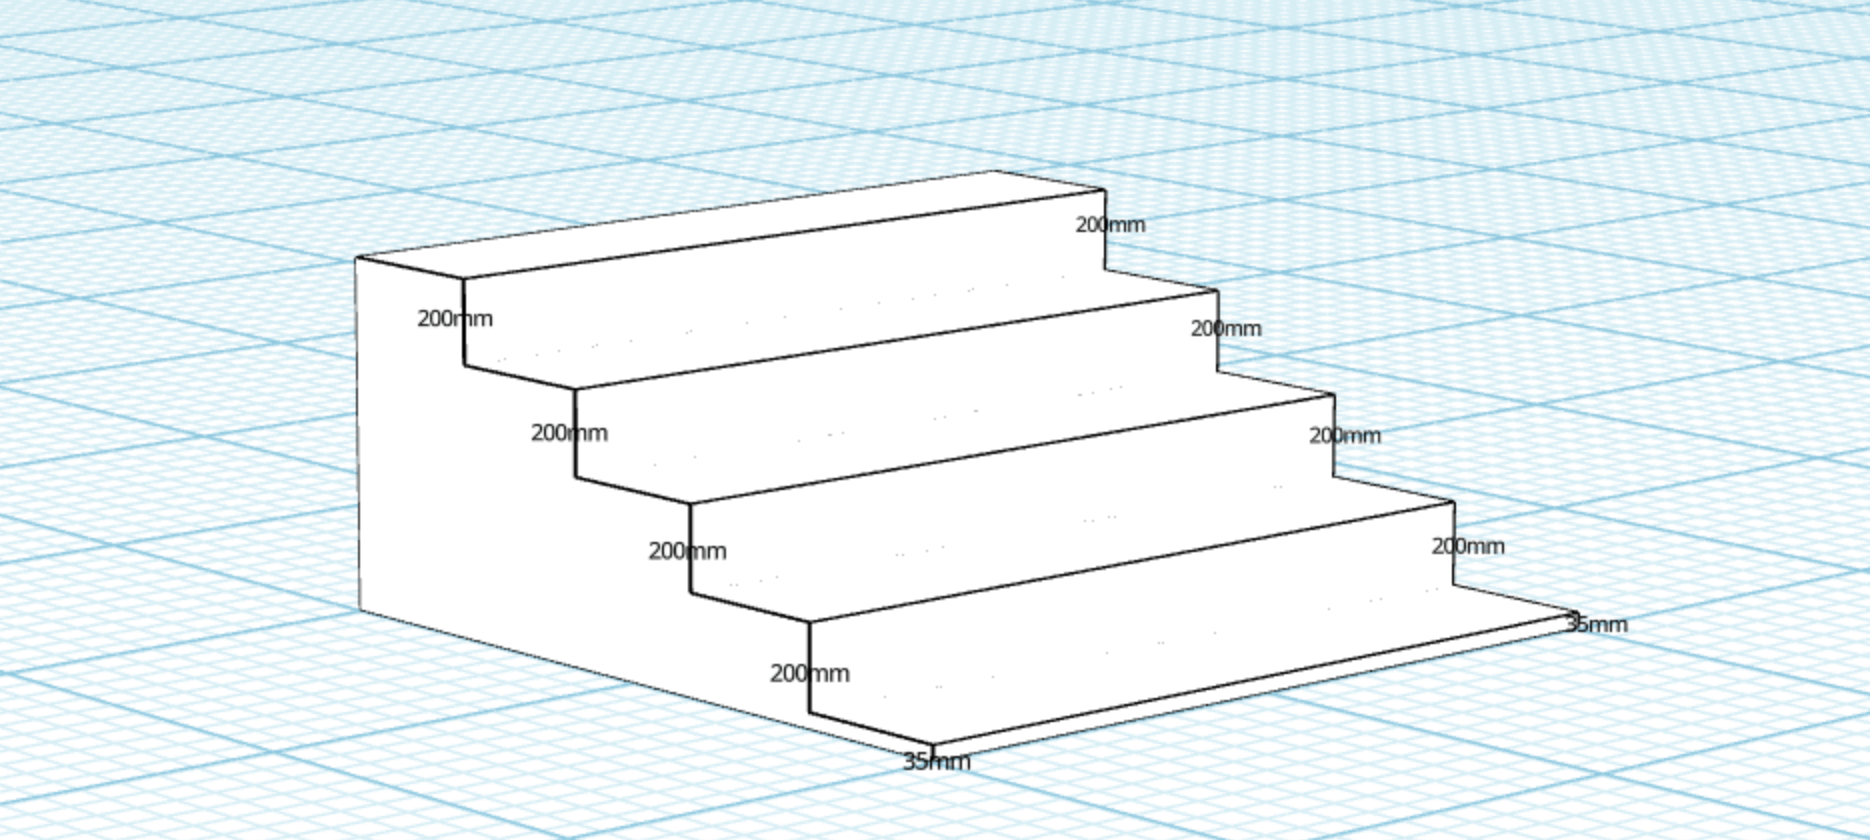
A step is considered to be a threshold step if the height is under 35mm. A rail placed at or near a threshold step, such as a step from a verandah/patio into a home, is recommended to:
- Be vertically positioned within close proximity of the threshold step without impeding the access or operation of a door;
- Be located between 865mm – 1000mm from FFL. The exact location within this range will be determined by the individual’s anthropometrics and how they interact with the environment;
- Be a minimum of 300mm long.
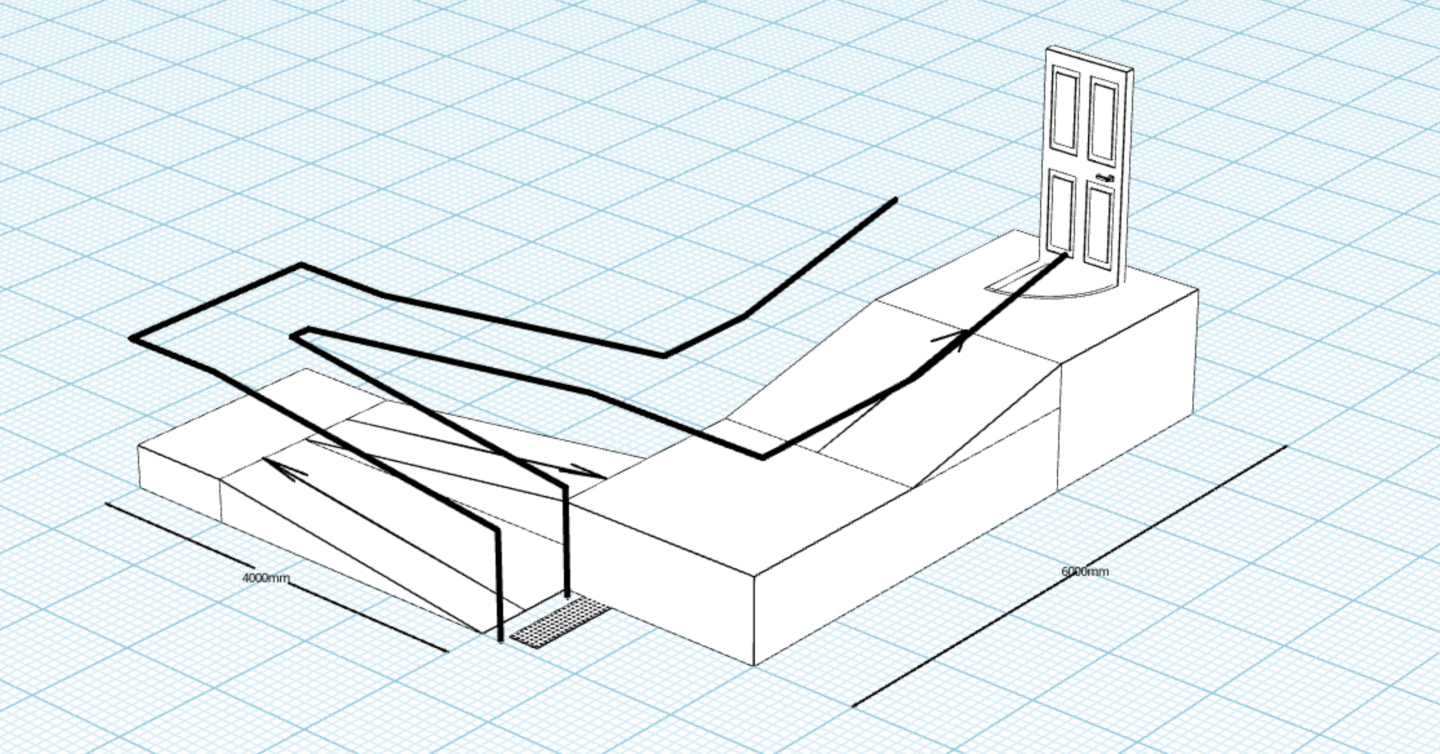
Ramp
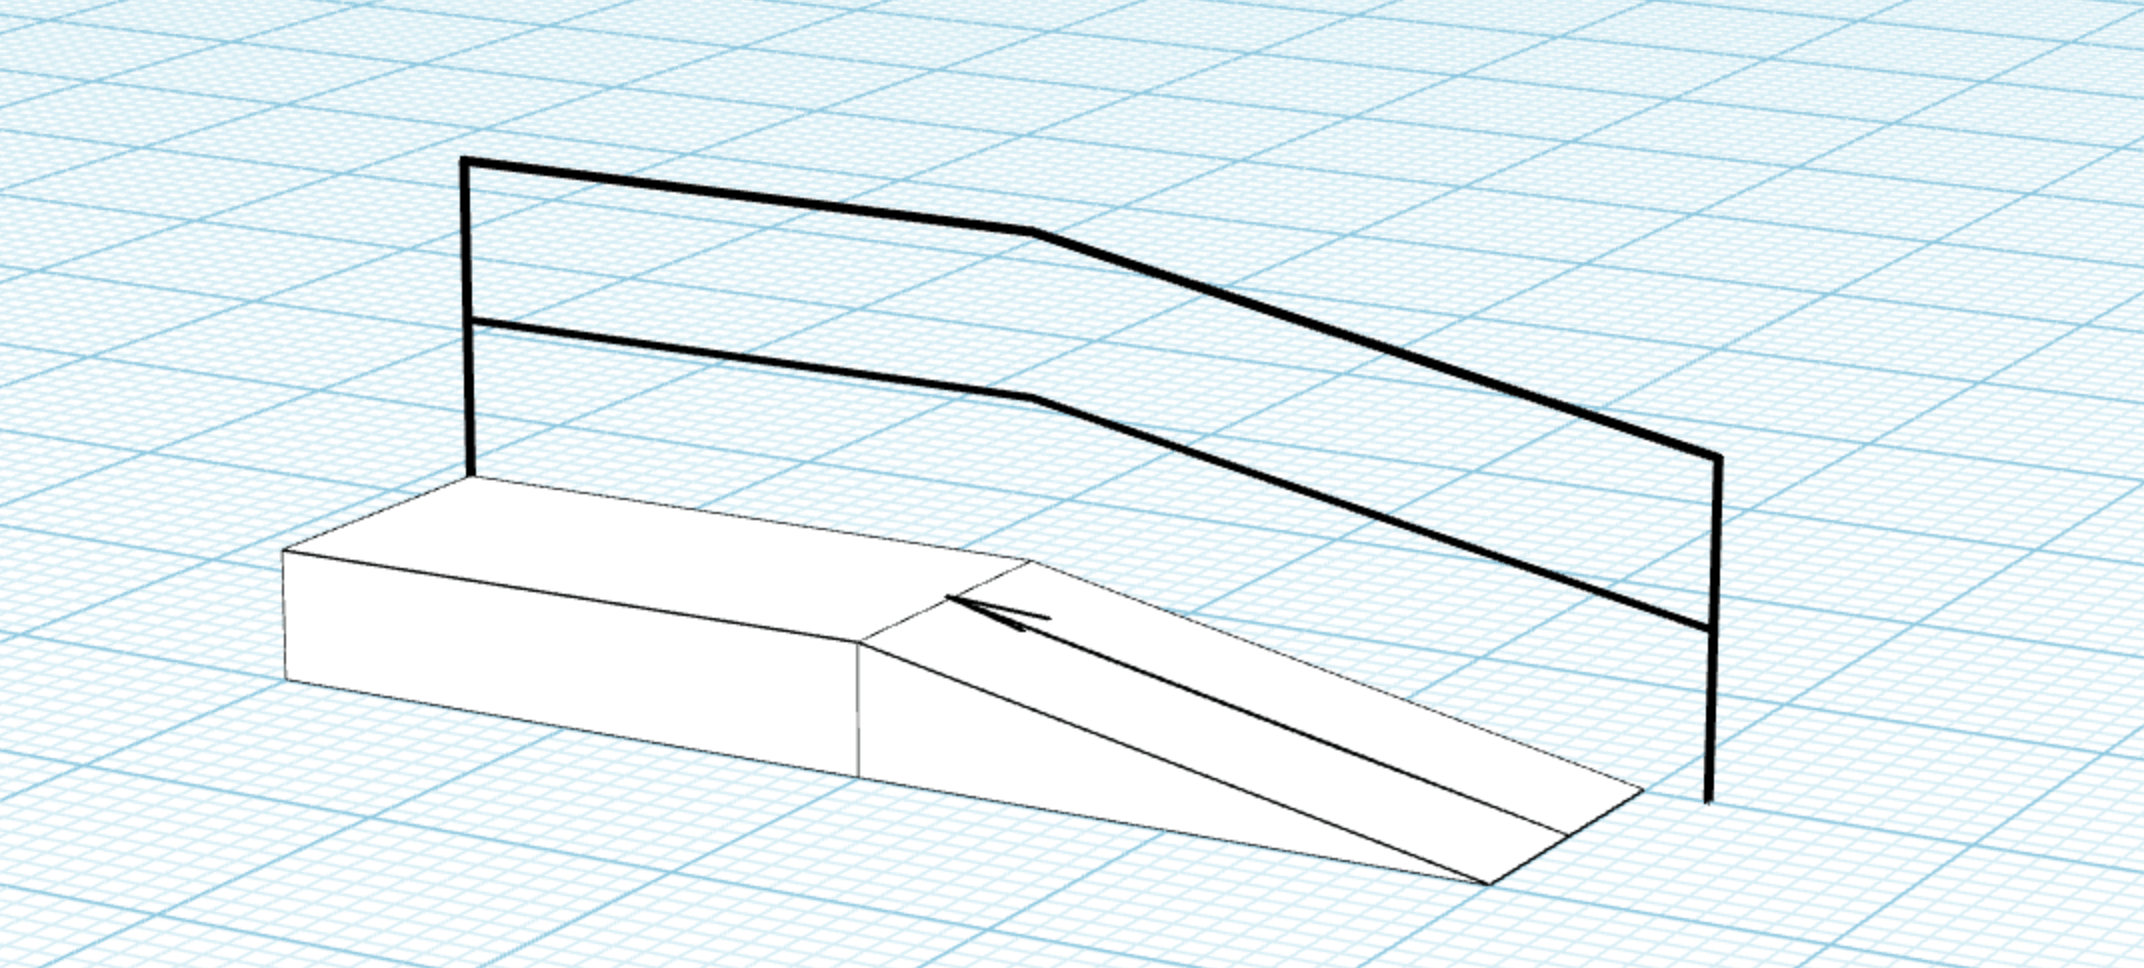
Handrails are prescribed at ramps to assist someone to ascend and descend. A ramp handrail is recommended to:
- Be located between 865mm – 1000mm from FFL. The exact location within this range will be determined by the individual’s anthropometrics and how they interact with the environment;
- Extend a minimum of 300mm horizontally past the transition point at the top and bottom of the ramp except where the inner handrail is continuous at an intermediate landing;
- Have a diameter between 30mm – 50mm;
- Run parallel to the gradient of the ramp.
3. Documentation and Diagrams
Once you have completed a comprehensive functional assessment to determine the most appropriate rails for your client, you will need to communicate this to the builder or tradesperson who will be completing the work.
One way to do this is by writing a Scope of Works (SOW) which documents the works that you are recommending.
A scope of works will typically include:
- Photos of the space to be modified;
- A detailed description of the proposed modifications;
- Measurements of the existing space and proposed modifications; and
- Diagrams of the proposed modifications.
It is a good idea to include a clause for deviation in your scope of works advising the builder or tradesperson to contact the OT, if they are unable to install the rails in the recommended position.
This ensures that if the works need to be deviated outside of the range that has been deemed functionally appropriate, the OT can re-assess the proposed location to clinically evaluate whether the change is viable.
To download our scope of works template, please click here.
Do You Need to Draw Rails? Moddy Makes it Easy
Occupational Therapists use a variety of software to support the design process of minor and major home modifications involving rails.
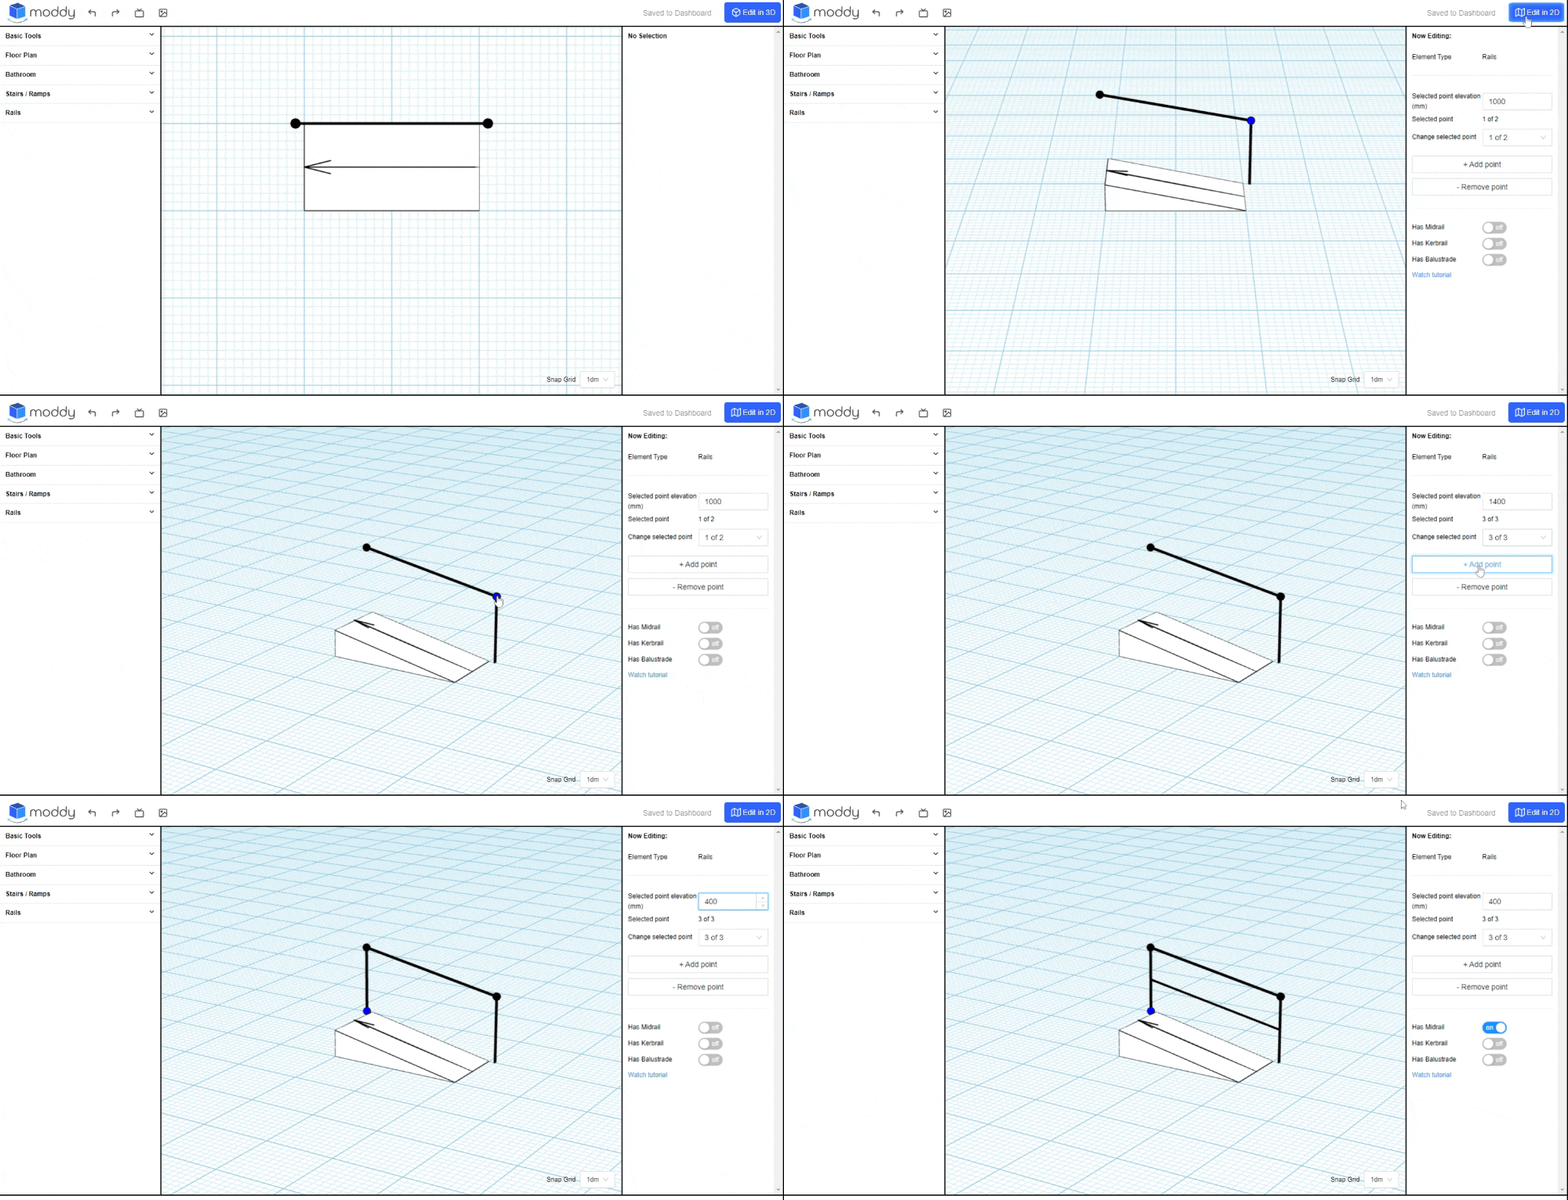
The diagrams can range from simple to complex and need to clearly show the proposed works in order to achieve the best possible outcome for the client.
Here at Moddy, we are passionate about helping Occupational Therapists design professional rail modifications.

Our software allows for free-hand drawing of rails, supporting all rail types and shapes, as well as rails for stairs, ramps, bathrooms and all other scenarios.
- Our product was designed in conjunction with practising Occupational Therapists.
- We allow the exportation of 2D/3D diagrams for our users to attach to their home modification reports.
- Our product is suitable for OTs worldwide
To get started as an individual or organisation, please click here.
Free 7 Day TrialGlossary
Anthropometrics: The body measurements of an individual including their height, weight, width and depth.
Ascension: The act of rising to a higher level.
Biometrics: The study of anatomical principles of movement that takes into account the unique movement patterns of an individual as a result of their age, health and body measurements.
Deviation: The act of differing from an established plan or accepted standard.
Diameter: A straight line that runs from one side to the other, passing through the centre of a circle.
Finished Floor Level (FFL): The level, or height, at which the floor of a building or structure is proposed to be built.
Functional Reach Range: A maximum distance an individual can reach forward beyond arm’s length whilst maintaining a fixed base of support. Extension beyond the functional reach range is associated with a risk of falling.
Intermediate Landing: The horizontal portion of a stairway or ramp where the individual can stop before continuing onto another portion of stairway or ramp. I.e. the middle landing.
Licensed Tradesperson: An individual who meets the requirements for a license that relates to the trade in which they practice.
Obstruction: A thing that impedes or prevents passage such as an obstacle or blockage.
Parallel: Lines, planes or surfaces that run side by side and have the same distance continuously between them.
Patio: A paved outdoor area adjoining a house.
Safe Working Limit (SWL): The SWL refers to the maximum safe force that can be exerted at any given time to lift, suspend or lower without fear of breaking.
Scope of Works (SOW): A document that contains a description of the the work to be performed.
Stud wall: A wall stud is a vertical repetitive framing member in a building’s wall of smaller cross section than a post. A stud wall consists of several of these.
Verandah: A roofed platform along the outside of a house, level with the ground floor.
References
Australian Standards 2021
Anti-slip grab rails quality awarded finished peened 900mm (2023) Axess Trading. Available at: https://axesstrading.com.au/products/grab-rails/32mm-straight-grab-rails/anti-slip-grab-rails/ (Accessed: February 28, 2023).
Satin stainless steel grab rail knurled & polished (no date) Emobility Shop. Available at: https://emobilityshop.com.au/products/satin-stainless-steel-grab-rail(Accessed: February 28, 2023).
Professional ot drawing software (2023) Moddy. Available at: https://moddy.io/ (Accessed: February 28, 2023).

